


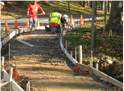

Unfortunately, even the best pavement is not indestructible. Heavy traffic usage and weather changes, along with several other outside factors, can lead to pavement distress, which is noticeable physical damage on roads or sidewalks. If not dealt with quickly, pavement distress can lead to more serious problems, all of which can significantly shorten the lifespan of your pavement.
But how can you spot pavement distress in time? This article from eHow.com explains how you can quickly identify pavement distress.
1. Assess cracks on the surface of the pavement. Alligator cracking appears as a network of cracks, forming a pattern somewhat like the skin of an alligator or wonky squares. As the U.S. Department of Transportation outlines in its “Pavement Distress Identification Manual for the NPS Road Inventory Program, 2006 -2009,” the severity of the distress can be measured. It is considered low when the width of the crack is less than 1/4 inch in width. However, the alligator distress is serious when the cracks are more than 3/4 inch wide.
2. Check the pavement’s surface for long strips of cracking. These are ruts that run either along the length of the pavement or sideways across the surface. In places where the cracks are more than 3/4 inch in width, the distress is considered serious and can buckle the pavement, causing bumps. Hot weather can cause this type of pavement distress.
3. Identify gouged-out areas or dips on the surface of the road. Pavement distress is characterised by potholes. These are concave holes on the surface, which are a nuisance for drivers. The holes can cause punctures in tires, gather water and lead to further cracking.
4. Look for dark square or rectangular patches of asphalt on the pavement. Distress can be identified by finding discolored areas where potholes or previous distress marks have been filled or covered over. The replacement asphalt causes a dark patch to be seen. Cracking, ruts or potholes can often be seen in proximity to the patching, which is indicative of pavement distress.
5. Crouch down and look across the surface of the pavement. Identify two lines of depressions in the road’s surface. If these are in the direction of the wheel paths, this distress is called rutting. Rutting occurs when continuous use of the pavement by heavy vehicles causes the surface to sink. It is classified as severe when the depressions are greater than 1 inch below the surface of the pavement.
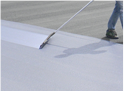
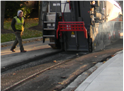
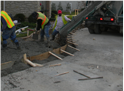
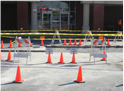
Once you have identified pavement distress, it is time to repair the damage. There are several products available that allow you to do the job yourself, but if you want to ensure your pavement is properly fixed, it is probably best to call a professional.
If you have any questions or if you would rather leave the repair work to the professionals, contact PTG Enterprises by calling 410-636-8777 or click here


